

How to Transform Your Balcony in 3 Days: From Dumping Ground to Lounge Zone
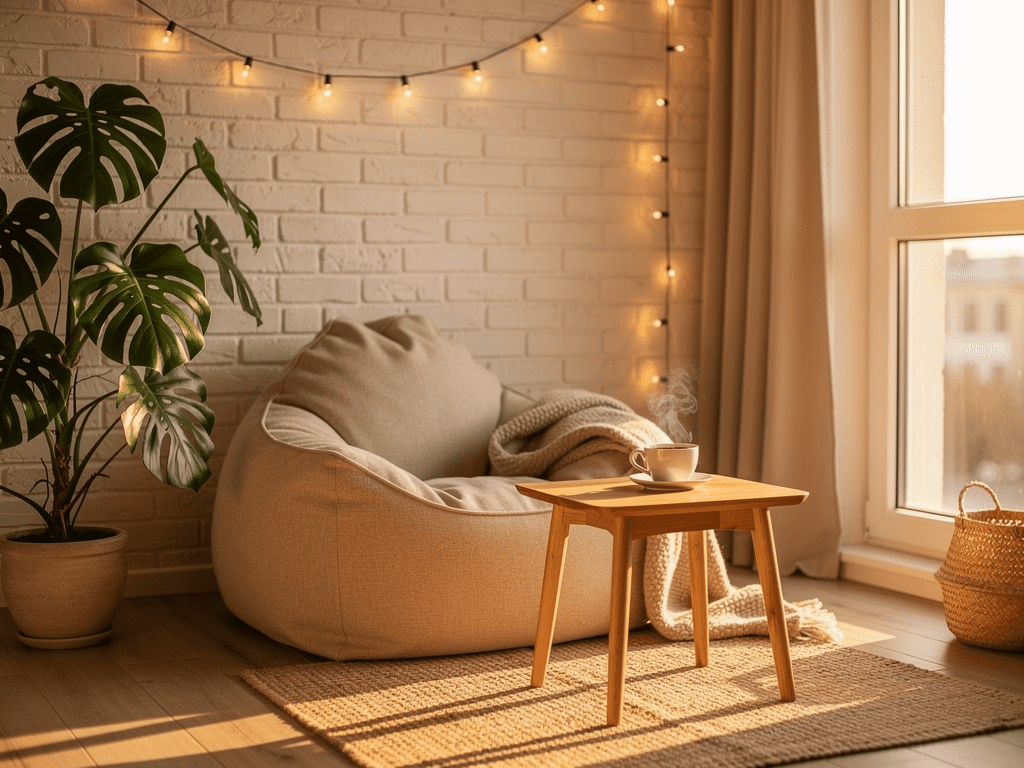
You know that moment — you open the balcony door and there it is… a storage dump of forgotten things, skis from two winters ago, and a paint can that “might come in handy someday”? Every second person has a junk-balcony. And every second person dreams of turning it into a coffee corner but thinks it takes a month of renovation and a contractor’s salary.
No. You can transform your balcony in a single weekend. No construction crew. No loan. Here’s a three-day plan with exact prices and a shopping list. After this weekend, you’ll be sipping coffee on YOUR balcony instead of staring at it wistfully through dirty glass.
In short:
– Clearing the junk — 3 hours. The three-box rule: keep / give away / toss
– Finishing — 6 hours. Laminate + wall paneling done yourself (tools can be rented)
– Budget — from 4,300 to 35,000 ₽. Three scenarios for any wallet
– Result: Sunday, 4:00 PM — you’re sitting on your balcony with a glass in hand, and it’s not a fantasy
Audio version of the article: perfect for on the go, while cooking, or on a walk.
{“@context”:”https://schema.org”,”@type”:”AudioObject”,”name”:”Balcony in 3 Days — How to Create a Lounge Zone Yourself”,”description”:”Audio version of the article.”,”contentUrl”:”https://hervibehub.site/wp-content/uploads/2026/10/podcast-balkon-za-3-dnya-lounge-zona.mp3″,”encodingFormat”:”audio/mpeg”,”duration”:”PT11M44S”}
—
Day 1 — Clearing the Augean Stables
Your balcony is not a storage unit. Repeat this three times before opening the balcony door.
Step one: take EVERYTHING out. Yes, even that ski suit you haven’t worn since 2014. Yes, even those paint cans that “might still be useful.” If you haven’t used something in a year — it’s trash. Period.
The three-box rule:
– “Keep” (things you’ve used in the last month)
– “Give away / sell” (things you can’t bear to toss — list them on Avito or your building’s chat)
– “To the dumpster” (everything else — no regrets, it’s clutter, not memories)
After clearing it out — a deep clean. Dust that’s been accumulating since the renovation before last, spiders in the corners, and strange stains of unknown origin on the windowsill. Broom + mop + rag with cleaning solution. It’ll take you about 3–4 hours. But after this stage, the balcony already looks twice as big as it seemed.
Pro tip: a melamine sponge (50 ₽ at any hardware store) wipes black marks off plastic window frames in seconds. Just wet it and scrub — no chemicals needed. It’s the first thing that catches the eye once the balcony is clean.
Do this: take “before” photos of the balcony. In three days, those photos will be your biggest achievement of the month. Seriously, the before-and-after contrast is pure dopamine.
Don’t do this: don’t try to “save” a broken chair or a box of cables from electronics you no longer own. That’s not thrift — that’s hoarding syndrome. An item that’s sat unused for a year is not something you need.
—
Day 2 — Insulating and Dressing the Walls
You won’t believe it, but a bare concrete balcony and a cozy lounge zone are separated by just 4–6 hours of work and 5–10 thousand rubles. No magic — just a pair of capable hands.
What to do with the floor
The fastest option — click-lock laminate. It goes down in an hour on a level surface, no glue needed. Underlayment is a must — otherwise you’ll hear every step of the neighbors below and your own thoughts. Underlayment thickness — 3 mm, cost — 200 ₽ per square meter.
Second option — WPC decking (wood-polymer composite). It doesn’t rot, handles temperature swings, and looks like natural wood. The only downside — the price. Twice as expensive as laminate.
Third option — linoleum. If your balcony “breathes” with humidity or you’re not sure about waterproofing. Modern wood-look linoleum looks decent, installs in 30 minutes, and wipes clean with a rag.
Walls: three tiers
PVC panels — cheap and cheerful. Butt-jointed, attached with construction adhesive. Downside: looks like an early-2000s office meeting room. Budget: 900 ₽ for a standard balcony.
Plastic “wood-look” paneling — the sweet spot. Nowadays they make it so convincing you can’t tell it from real wood from a meter away. It mounts on a batten frame (20×40 mm), with insulation between the battens. Wipes clean with a regular cloth. Budget: 2,500 ₽.
Wooden paneling — beautiful, smells like the forest, but needs moisture treatment once a year. If your balcony is sunny, the wood will “move”: expand in summer and contract in winter. Experienced pros leave a 2–3 mm gap between boards. Budget: 6,000 ₽.
Important: if the balcony is NOT glazed — no laminate and no paneling. Glazing comes first. Otherwise the first downpour will turn your lounge zone into a swimming pool annex. Cold aluminum glazing — from 15,000 ₽ for a standard 3-meter balcony.
Do this: buy materials with a 10% surplus. Beginners always ruin at least one panel when cutting corners. And rent a jigsaw — 300 ₽/day at any tool rental.
Don’t do this: don’t skimp on insulation. 5 mm foil foam is not insulation — it’s self-deception. Minimum 20 mm of extruded polystyrene. The price difference is 700 ₽; the difference in feel is “it’s freezing here” versus “I could live here.”
—
Day 3 — Furniture and Decor: Shopping Checklist
By now you have a clean, insulated, finished balcony. All that’s left is to add the thing this was all for — coziness. You can never have too much coziness, but a 3×1.2 meter balcony is not a living room, so pick furniture that works at 100%.
- Bean bag chair (600–2,500 ₽). The beanbag is the king of balconies and small spaces. Unlike a regular armchair, it doesn’t need extra centimeters for reclining. It takes up exactly as much space as the person sitting on it. Plus you can kick it into a corner when you need more room.
- Low table (800–3,000 ₽). An IKEA LACK table or a folding one from Leroy Merlin. It fits a coffee cup, laptop, and phone — that’s all you need. A folding one is ideal because when collapsed it’s flat and can hang on the wall.
- Battery-powered string lights (200–500 ₽). One source of warm light changes the atmosphere radically. No need to drill into the wall for a sconce — just string lights around the ceiling perimeter. Go for warm (2700K), not cool — cool feels like an operating room.
- Rug (500–1,500 ₽). An outdoor polypropylene rug. Moisture-resistant, cleans with a blast of water from the shower. Look in the “garden” section.
- Potted plant (300–1,000 ₽). Spider plant, snake plant, or monstera. These three survive even if you forget to water them for weeks. Skip orchids and ficus — they’re fussy and will throw a drama with yellowing leaves on a balcony with temperature swings.
- Cushions — 2–3 pieces (300–700 ₽ each). You can just toss them on the floor. Or in the chair. Or hug one while you drink coffee at 7 AM and watch the city wake up. Textiles make a balcony feel lived-in instantly.
- Throw blanket (500–1,500 ₽). Even in summer. Because an evening balcony is always a bit chillier than you expect. And because wrapping yourself in a blanket with a cup of tea is 80% of the point of a lounge balcony.
—
Three Scenarios: Comparing Budgets
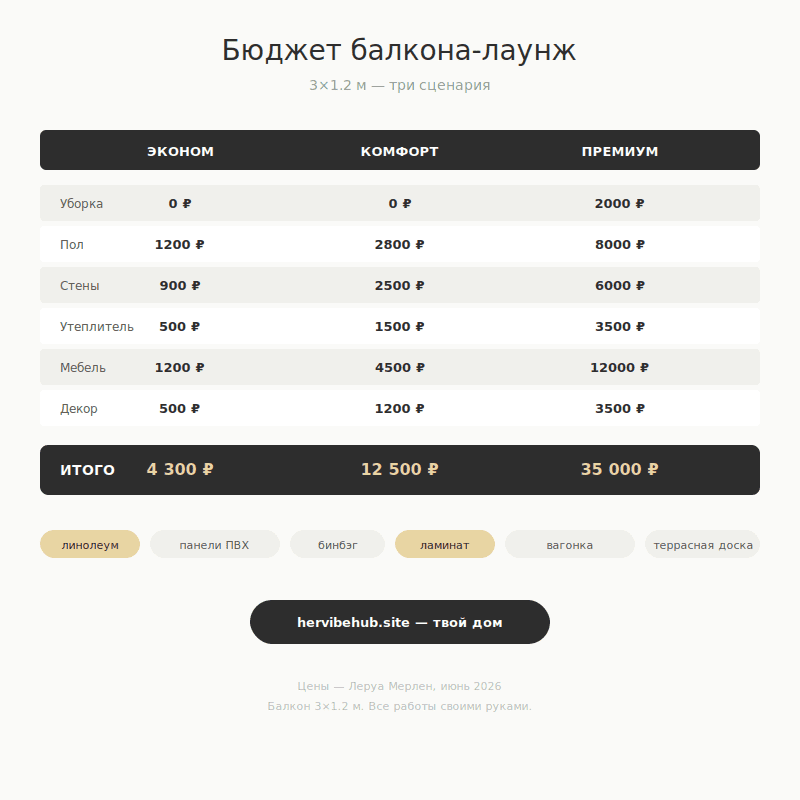
The same 3×1.2 meter balcony can become a lounge zone for 4,300 ₽ or for 35,000 ₽. The difference is in materials and comfort level. Here’s the breakdown across all expense categories.
| Item | Budget (₽) | Comfort (₽) | Premium (₽) |
|---|---|---|---|
| Cleaning and prep | 0 (your own hands) | 0 | 2,000 (cleaning service) |
| Floor | 1,200 (linoleum) | 2,800 (AC4 laminate) | 8,000 (WPC decking) |
| Walls | 900 (PVC panels) | 2,500 (plastic paneling) | 6,000 (wood paneling) |
| Insulation | 500 (5 mm foil foam) | 1,500 (20 mm XPS) | 3,500 (30 mm XPS + insulation) |
| Furniture | 1,200 (rug + string lights) | 4,500 (beanbag + table + rug + lights) | 12,000 (2 chairs + table + accessories) |
| Decor | 500 (2 cushions) | 1,200 (cushions + plant + throw) | 3,500 (designer planters + textiles) |
| TOTAL | ~4,300 ₽ | ~12,500 ₽ | ~35,000 ₽ |
Budget: clean, tidy, you can sit there. No frills, but you can’t call it a dump anymore. Comfort: cozy, you’ll want to invite friends over for coffee, nothing to be embarrassed about. Premium: you’ll live on this balcony all summer and post stories that rack up a hundred “wow, where did you get that?!” reactions.
—
Final Checklist: 7 Steps to Your Dream Balcony
Print it out and stick it on the fridge. Check items off as you go. When the last one is crossed off — pour yourself a drink.
- Move ALL balcony contents into the hallway (3–4 hours)
- Sort everything into three boxes: keep / give away / toss (1 hour)
- Deep clean: broom → mop → rag with cleaner → melamine sponge on the frames (1 hour)
- Measurements: length × width × height — save to your phone notes (15 minutes)
- Buy materials: floor + walls + insulation + tool rental (trip to Leroy Merlin, 2 hours)
- Installation: floor → battens → insulation → walls → baseboards (4–6 hours)
- Finishing touch: furniture + string lights + plant + throw + a glass of prosecco (2 hours)
One weekend workflow: Saturday 10:00 AM–6:00 PM — cleaning, measurements, shopping, floor and wall installation. Sunday 11:00 AM–3:00 PM — decor, furniture, string lights. Sunday 4:00 PM — you’re sitting on YOUR balcony. And it feels amazing.
Verified: prices — Leroy Merlin Stavropol, June 2026. Experience: 11 balconies transformed over the past two years by HerVibeHub readers. Real before/after photos from real people — in our Telegram.
—

Frequently Asked Questions
If the balcony isn’t glazed — where do I start?
With glazing. Cold aluminum profile — from 15,000 ₽ for a standard 3-meter balcony. Warm PVC — from 30,000 ₽. Without glass, any flooring and wall finishes will rot in a single season — money down the drain.
How much time will the makeover actually take?
Two full days if you’re working solo. One day if you have a helper. Three days if you have two kids under five who are “helping” (tested by our editorial team).
Do I need to get any permits for a balcony makeover?
Cleaning, painting walls, replacing flooring, furniture — no. Replacing the glazing — yes, if you’re changing the configuration. Removing the windowsill block and merging the balcony with the room — yes, with permits from the BTI and architecture department, otherwise you’ll face a fine and an order to restore everything “as it was.”
Which flooring should I choose — laminate or linoleum?
Laminate is prettier and warmer. Linoleum is cheaper and waterproof. If your balcony is glazed and guaranteed dry — go with laminate. If there’s a risk of leaks (top floor, old roof) — linoleum or WPC decking.
How do I clean a balcony after 10 years of storing building materials?
Stiff brush + Pemolux powder — for cement dust. Vinegar solution (1 part vinegar to 3 parts water) — for mold. Melamine sponge — for black marks on plastic frames. All together costs 200 ₽, and the result looks like a 3,000 ₽ professional cleaning.
Can you make a lounge balcony for 0 ₽?
Ha. Yes. Borrow a steam cleaner from your neighbors (free), lay down an old rug from inside your home, drag over a pouf from the living room. Get a plant cutting from a friend. It won’t be as Instagram-worthy, but the function is the same — a place where you can sit, breathe, and not stare at a junk pile.

